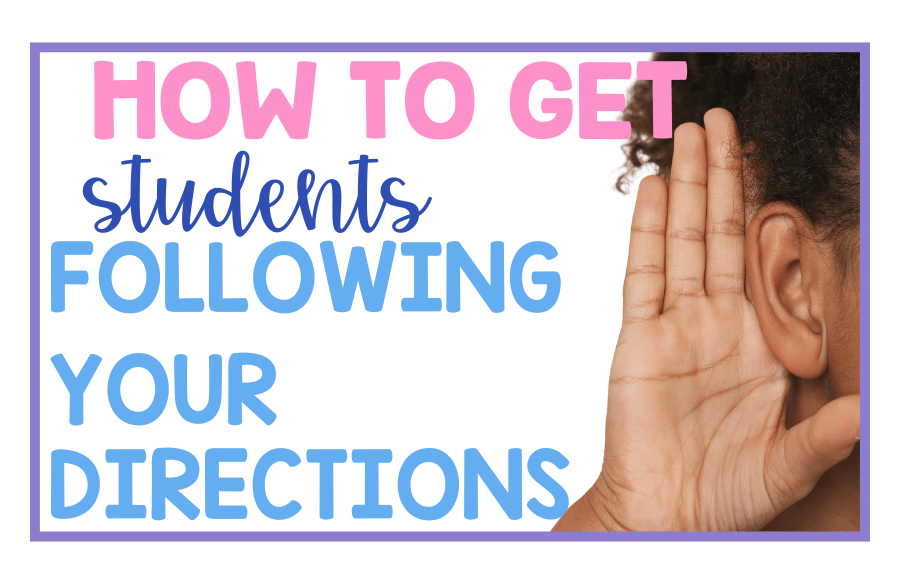
How to Get Students Following Your Directions
Getting elementary students to consistently follow directions can feel like an uphill battle for many teachers. Whether it’s the challenge of keeping their attention or the frustration of repeating instructions multiple times, helping young learners stay on track is no small feat. But following directions is a basic life skill that lays the foundation for a well-managed classroom and smooth learning experiences.

In this post, we’re diving into practical, effective strategies that you can start using right away to help your students become better listeners and direction-followers. Let’s explore how clear communication, positive reinforcement, and a few clever tricks can transform your classroom into a place where instructions are heard, understood, and followed with ease.
Clear and Concise Communication
One of the most effective ways to ensure your students follow directions is by making sure those directions are clear and concise. Young children can easily get lost in a sea of words, so it’s essential to keep your instructions simple and straightforward. Here’s how you can fine-tune your communication to better suit the needs of your elementary students:

OVERLOADED caseload? No idea how you are going to manage it all? This Summit is for you.

calling all SPED Teachers
OVERLOADED caseload? No idea how you are going to manage it all? This Summit is for you.
Use Simple Language
When giving directions, use language that is age-appropriate and easy to understand. Avoid complex sentences or jargon that might confuse students. Instead of saying, “Please proceed to your respective workstations and commence with the designated task,” try, “Go to your desks and start your work.” The clearer your language, the easier it will be for students to grasp what you want them to do. This is a way to help with their comprehension skills too.
Break Directions Into Manageable Steps
Multi-step directions can overwhelm young learners, leading to confusion and frustration. To prevent this, break down your instructions into smaller, more manageable tasks. For example, instead of saying, “Get your math book, turn to page 34, and complete the first five problems,” you could say, “First, get your math book. Next, turn to page 34. Finally, do the first five problems.” By separating each action, you allow students to process and complete one task before moving on to the next.

At the start of the year, especially when it is the first time going through a routine, say one direction, allow the class to follow it and then give another. As your students start to get the understanding of this, tell them you are going to give them more directions. I like to even say, “You have 2 directions to follow.” This helps them remember they need to listen with close attention to two different steps and not tune out after the first one.
Incorporate Non-Verbal Cues
Non-verbal communication can reinforce your verbal directions, making it easier for students to understand and follow along. Gestures, such as pointing to where you want students to go or holding up the number of fingers that correspond to the steps they need to take, can provide visual support that clarifies your instructions.
Additionally, using visual aids like pictures or symbols can be especially helpful for students who are visual learners or who might struggle with verbal instructions alone. This is one of the best ways to support students endnote have to repeat yourself. You can put pictures up of the steps you want the students to take as you say them. It is a simple step that does not add more time to your day, but only saves it. If students miss a step, they can just look up at the board to remember what comes next.
This is a game changer for your classroom management because it makes students more independent and supports all students whether they have difficulty attending to oral directions, struggle to process language, or simply don’t always listen. Need some for your classroom? You can grab them here and they come in a variety of colors to match your classroom theme!
Check for Understanding
After giving directions, it’s important to check that all students understand what is expected of them. This can be as simple as asking a few students to repeat the directions back to you or asking the class if anyone has questions. A quick review ensures that everyone is on the same page and ready to follow through with the task at hand.
By focusing on clear and concise communication, you set the stage for your students to successfully follow directions, reducing misunderstandings and making your classroom a more organized and effective learning environment.
Explicitly Teach
It is important to teach students directions for routines in a particular way that is explicit. Take these steps to ensure your students learn the directions the first time you teach a routine.
1. Verbally tell students what you want them to do. Modeling it at the same time is like doubling the bang for your buck. This way students can SEE and HEAR what you mean.
2. Ask students what they notice. What do they see and hear? Have a few students answer.
3. Have a student come and practice it in front of the class. Then ask the students again, what do they notice?
4. Repeat if needed.
5. Optional (this is completely dependent on the classroom you have) You can have a student do a non example. I say proceed with caution, because they may get a lot of laughs and you do not want students who struggle socially to think that is the way they need to act to make their peers laugh.
6. Have the whole class practice now!
7. Give feedback- be specific!
This is a great system to get into at the beginning of the year. This shows kids you are serious about your routines and directions you give. I suggest adding this into your lesson plans at the beginning of the year because it does take time. This is an essential component to any behavior management strategy. Giving a child directions may seem simple, but when you’re in it- you know a million things can go wrong.
Modeling and Practicing Directions
One of the most powerful tools you have as a teacher is the ability to model the behavior you want to see in your students. When it comes to following directions, showing students exactly what you expect can make a world of difference. By modeling and practicing directions, you create a clear example for students to follow and give them the opportunity to practice until they get it right. Here’s how to effectively use this strategy in your classroom:
Modeling Desired Behaviors
Children learn a lot by observing the adults around them. When you model how to follow directions, you give your students a concrete example of what they should do. For instance, if you want students to line up quietly before leaving the classroom, demonstrate how to stand in line with your hands at your sides, facing forward, and without talking. Then, have a few students practice while the rest of the class watches. This not only shows them what the behavior looks like but also sets the expectation that everyone will do the same.
This is one of the most challenging aspects for adults at times. Take for example when you are walking in the hallway on your way to physical education and you see a teacher bestie. What do you want to do? Probably give a quick hi. But if it was a student- would you be okay with them saying hi? If you do it, it also will give the students the green light that they can too.
This is something to do for the entire school year. Model what you expect, because kids are always watching!
Role-Playing and Practicing Directions
Role-playing is a fun and interactive way for students to practice following directions. You can set up scenarios where students take turns being the “teacher” and giving directions to their peers, or where they act out situations they might encounter during the school day. For example, you could role-play the steps for transitioning from one activity to another or how to follow the steps in a science experiment. This practice helps reinforce the directions and makes it more likely that students will remember and follow them in real situations.
This can be something fun that they earn being allowed to be the teacher’s assistant for the day and give some directions, or you can pick randomly someone who is just following the directions in the moment. This is going to be much more motivating for the younger students.
By modeling and practicing directions regularly, you help your students develop the skills they need to follow instructions effectively. This proactive approach reduces misunderstandings, builds confidence, and fosters a classroom environment where students know exactly what is expected of them.
Use Visual Supports
Visual supports are incredibly effective tools for helping elementary students follow directions. Young learners often benefit from seeing what they need to do rather than just hearing it, as visual cues can make instructions clearer and more accessible. By incorporating visual schedules, direction pictures, hand signals, written directions, and signs into your classroom routine, you can provide students with constant reminders of what is expected, helping them stay on track. Here’s how to use these visual supports effectively:
Visual Schedules
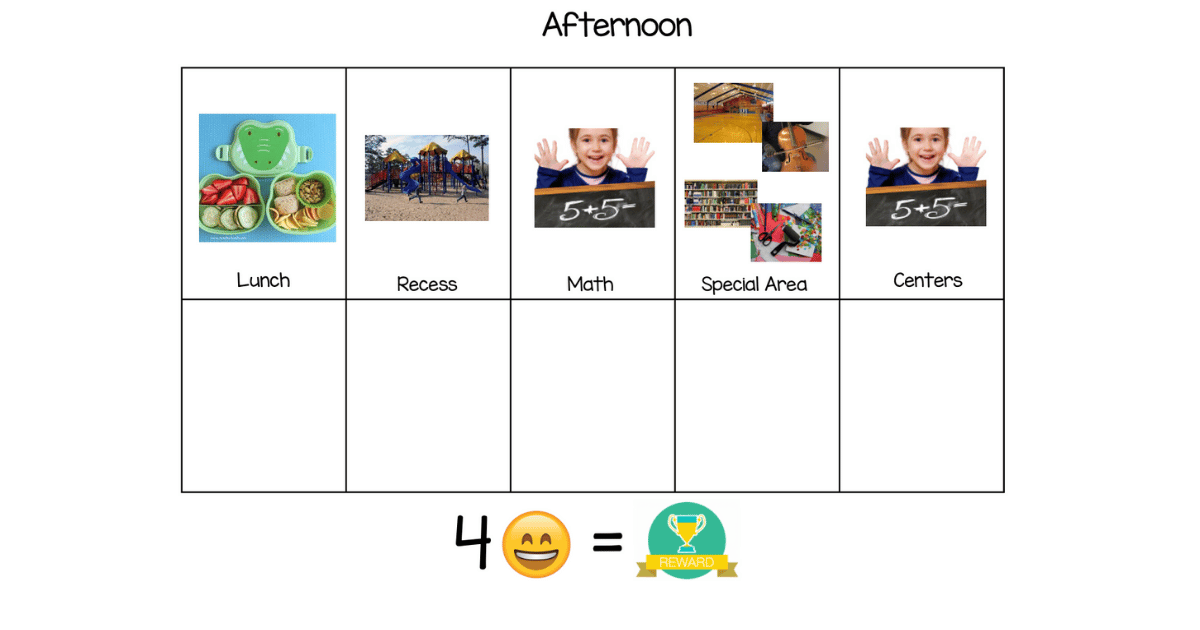
Visual schedules are one of the most powerful tools you can use in your classroom. These schedules typically include pictures or icons representing each activity or task throughout the day. For example, you might have images that represent morning meeting, math time, recess, lunch, and so on.
Display the schedule in a prominent place where students can easily see it and refer to it throughout the day. By providing a clear sequence of activities, visual schedules help students understand what’s coming next, reducing anxiety and improving their ability to transition smoothly between tasks. These support students who have limited attention spans or who have a lot of anxiety about the school day. Please keep in mind, your visual schedules for students who have services like occupational therapy or physical therapy should be keep separate and for their independent use. Learn more about individual visual schedules here.
Although I am sure you have seen clipart images before for visual schedules, these can still be ambiguous for students. Real life pictures of your classroom or even these that have stock photos can be much more real and meaningful to kids! Get real life schedule pictures here!
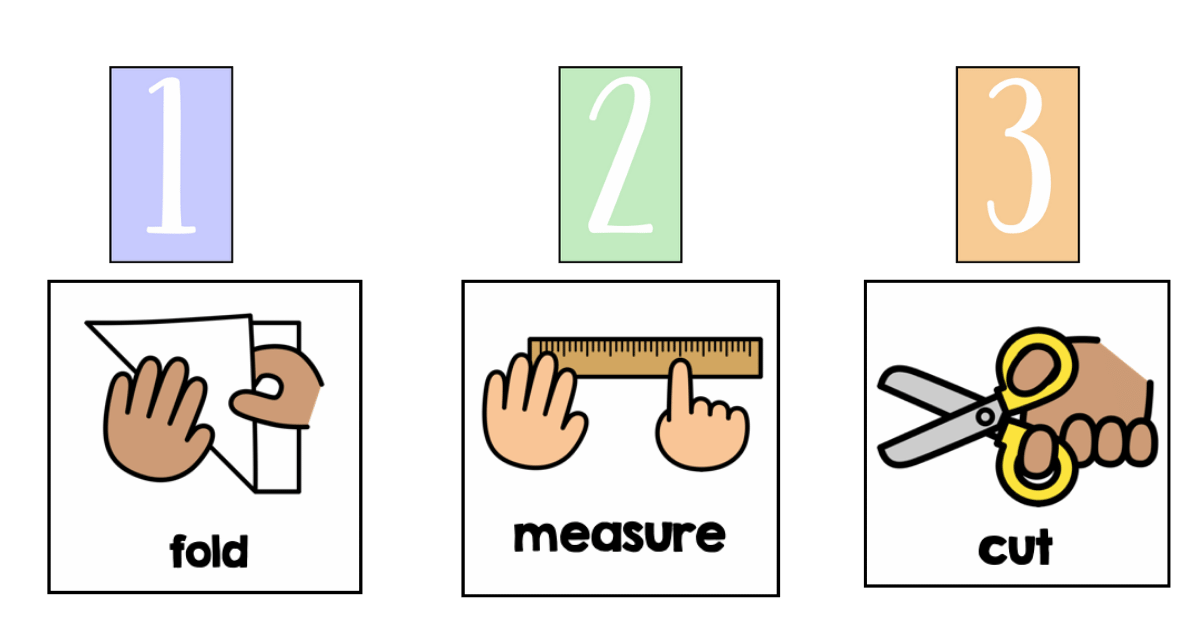
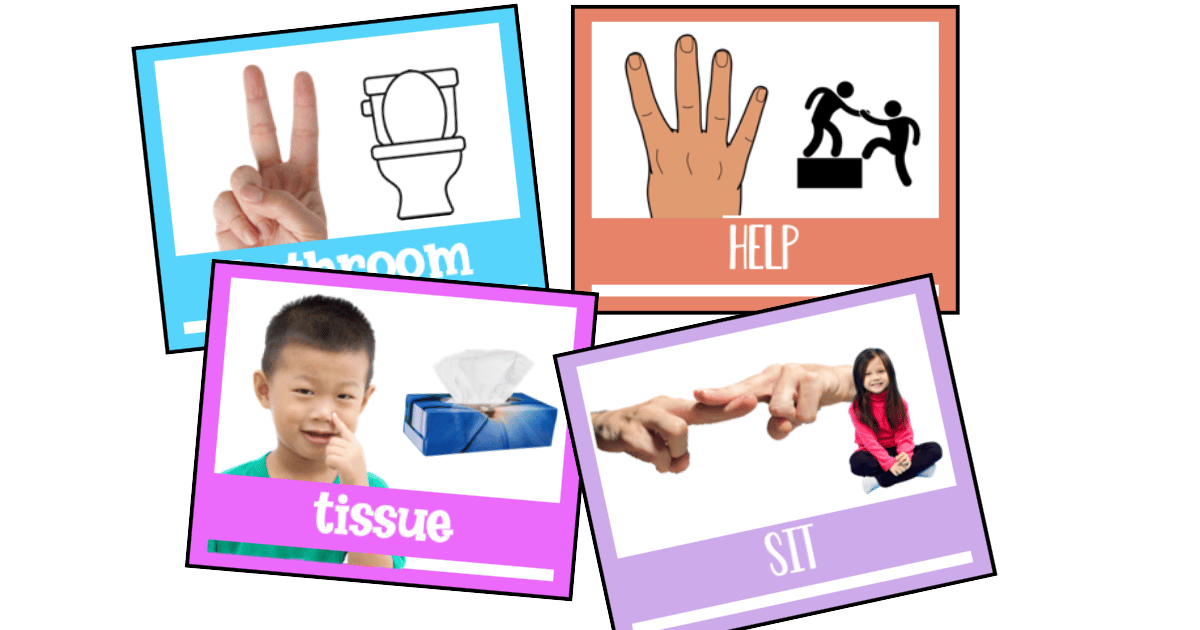
Visual Direction Pictures
Sometimes, it’s easier for students to follow directions when they can see a picture of what they’re supposed to do. It is helpful when you have a set of instructions with several steps to have the images that match up on the board. That way if you have a student who is distracted, one who is going to the rest room, and another who comes mid lesson back from speech therapy, you can just point to the board and they can jump right in. They are great visual reminders of what steps students need to take.
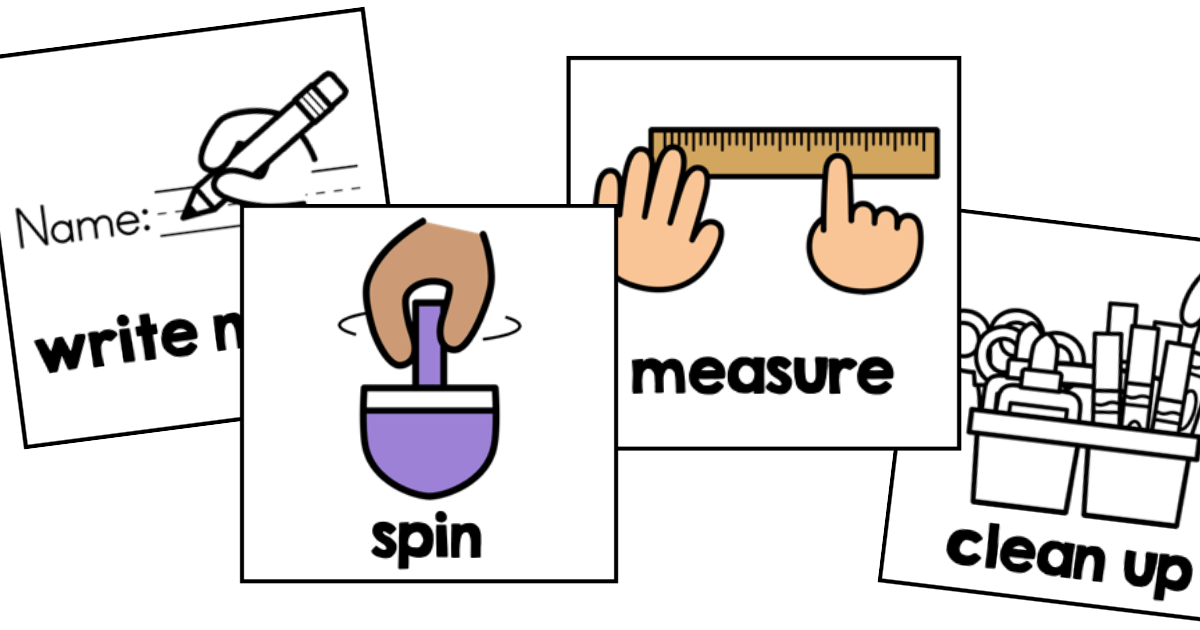
This is another important skill you will have to teach the students, but it can save your sanity. You can even have a picture list of things they need such as scissors, a blue crayon, or glue. Want those for free? You can grab them here!
These visual direction pictures can work across all areas of the school. Take for example a class like visual arts. During a hands-on activity, there can be many steps. Students can easily fall behind and then students are at all different stages. Some are read to finalize it and some are on the first step. Before you know it, it can be chaos. But with the pictures it can allow everyone to be at different steps and still be successful! No more being exhausted or losing your voice at the end of the day just from repeating directions.
Get your own set of visual directions here!
Hand Signals
Hand signals are another excellent way to visually reinforce directions. By using consistent hand signals for common instructions, you create a non-verbal communication system that students can easily understand and follow. For instance, you might use a hand signal for “stop,” such as holding up your hand with your palm facing outward, or a signal for “quiet,” like placing a finger over your lips or a zero with your hand. Teaching students these signals and using them consistently it a great way to reduce noise and confusion, especially in situations where you need to give directions quickly or quietly.
However, if you get too many signals going- your students may forget. So what should you add to your classroom? You got it- visuals. Have a place where students can easily look and see what the hand signal means. You can grab some for your classroom here. These are great for both younger and older children as it is private.
Written Directions
Written directions are useful for reinforcing verbal instructions, particularly for older elementary or middle school students who are comfortable with reading. You can write the steps for a task on the board, provide them on a worksheet, or create posters that outline common classroom procedures. For example, if you’re giving directions for a group activity, you might write, “1. Get into groups of four, 2. Assign roles, 3. Start the project,” on the board. This gives students a reference point they can look back to if they forget the next step, promoting independence and reducing the need for repeated verbal reminders.
Signs and Symbols
Simple signs and symbols, like a stop sign or a thumbs-up, can be powerful visual cues for guiding student behavior. A stop sign, for example, can be used to indicate areas of the classroom where students should not go or as a signal for when it’s time to pause and listen. Similarly, a thumbs-up symbol might be used to indicate that students have done something correctly. You can place these signs around the classroom or use them during instruction to quickly communicate expectations without disrupting the flow of the lesson.
By integrating visual supports like schedules, direction pictures, hand signals, written directions, and signs into your classroom, you create a more structured and supportive environment for your students. These tools help bridge the gap between understanding and action, making it easier for students to follow directions and stay engaged in their learning.
Helping elementary students follow directions doesn’t have to be a constant struggle. By incorporating clear communication, modeling and practicing, and using visual supports, you can create an environment where students understand what’s expected of them and are motivated to follow through. Whether you’re breaking down instructions into manageable steps, using visual schedules and hand signals, or encouraging students to practice following directions, these strategies can transform your classroom into a more organized and effective space.
Although yes, our goal is to create life skills where students listen to directions. However, we need to teach and practice those listening skills. These supports also do not have to be used the entire school year. They can be just for the start of the year and fade as the year goes on. They are a good first step to help students who struggle with their receptive language skills. These can be just one or two different strategies you can use within your classroom. Make sure to not add too many and add even more to your plate!
Remember, consistency and patience are key. Students are not going to get it perfect every single time. As students become more familiar with these techniques, you’ll likely see a noticeable improvement in their ability to follow directions, leading to smoother transitions, less frustration, and more time focused on learning. Embrace these strategies, and watch as your students grow more confident and capable in their ability to listen, understand, and act on the directions you give them.
Want supports like this delivered to you each and every month? Join the Behavior Membership Hub now!